
September 5, 2024 · Updated August 24, 2026
By Alexander Grabovetskiy — Master Woodcarver · Founder, School of Wood Carving · 24 min read
What are the best materials for beginners in wood carving?
The best materials for beginners in wood carving are one good chip carving knife, a basswood board, a strop with paste, and something to keep the board still. That is the short list. My teacher gave me paper and a pencil first, then one blade. The gouge came later, and only once I could handle steel.
A lot of people buy carving tools, carve for about a month, and then the edge dies on them. They get frustrated. Some blame the wood, some blame themselves, and neither one is guilty. My master had a line for this. I brought him a board once and complained that it was bad wood, and he told me no such thing as bad wood exists. Only dull tools.

A working grip on a handle, with a pale plank and a row of tools behind it.
What follows is the list I really give, in the order I give it. It carries no bench and no drawer of gouges nobody touches. You will see which tool comes first, why its price surprises people, and why my master made me wait before he handed over a gouge.
- Your number one purchase is a knife, and cheap steel is never a bargain.
- My number 12 has sat on the shelf 20 years and still does 99.9% of my work.
- Buy a gouge second, because harder projects are where a blade runs out of road.
- Basswood is the board to learn on. Europe calls that same tree lime, or linden.
- Sharpen everything the day it arrives, whatever brand is stamped on the steel.
What is the first thing I should buy for wood carving?
Your number one tool, the one you really have to buy to carve, is a chip carving knife. And that name says nothing about price. It is still an expensive tool, whatever the word chip suggests.
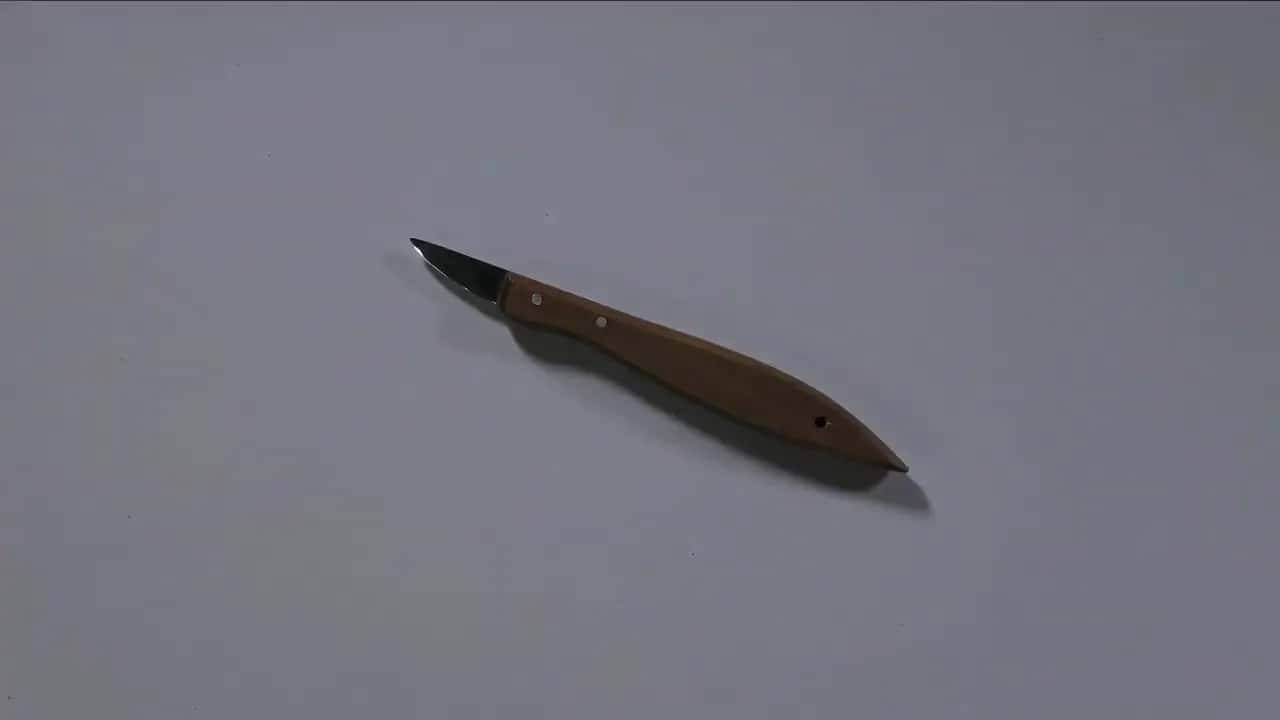
I would suggest a Pfeil, and I have written at length about the knife I put in a beginner's hand. My own preference, though any other brand will do the job, since the quality of the steel is what wins me there. Number 12, Swiss made, and available in most countries now. Somewhat expensive, and worth every dollar.

The whole tool held flat over my oak bench.
That one has been with me 20 years already. Old now, and it is still in my hand every single day. One payment, one time, then a friend for life.
Do not go with the cheaper options. Cheaper options exist, and I know the brands and the places that sell them. Either quality gets sacrificed, or the metal is unstable and snaps. Mine can break too. Even so, I would rather put one really good tool in your hand at the beginning than a cheap one that lets you down.

How the tool gets held, blade forward, not just laid out for a photograph.
I nearly called a knife my first tool, which is wrong, because it was the second. First came a pencil and a sheet of paper, handed to me by my master while I was his apprentice. Years later, in a prison cell, I made a blade myself, no more than 10 or maybe 12 millimeters, less than half an inch, and I carved furniture with it.

An 8B pencil on its own. The real first tool, and the one people skip.
Here is the whole order laid flat, with what I say about each thing beside it.
| Item | When | What I say about it |
|---|---|---|
| A knife for chip carving | First | The one tool nobody should economize on |
| Basswood board | First | Soft enough to learn on, and it still holds every detail you carve |
| Leather plus a bar of paste | First | A scrap from the leather shop works |
| A clamp, or paper and glue | First | Something must hold the board still while both hands work above it |
| One gouge, a number 8 near 10 mm | Second | Buy it once the blade stops flying |
| V-tool | Later | Among the most used tools in relief carving, and I would rather one nearer 45, or even 35 |
| Bench, vise, mallet | Later | My Bessey vise cost $20 at Home Depot |
| A CBN wheel at $300 | Skip | I own them. Diamond does that job for a fraction of the money |
How much can one knife really do?
My number 12 does 99.9% of my work, and most of the shelf behind me sits untouched. Believe me, one blade goes a long way.
Maybe 15 or 20 knives live in this shop and they are all different. Most of them I never pick up. Nearly everything goes through a single favorite, so nobody needs the tools hanging behind me to get a beautiful result.

The wall of gouges above my bench. This is the picture I ask beginners to ignore.
A client of mine wanted a coffered ceiling, which was more than carving alone. I designed the whole thing around one knife. It took a month. I made it right on time. So yes, a real business can run on pretty much one blade.

One tool held up over the panel it helped carve.
David Esterly counted the tools on his bench in his book The Lost Carving.
There are 130 tools on the workbench.
A hundred and thirty on one bench. And still I keep reaching for that same one knife every day. For the wider view of a first workshop, my page on what is needed to carve wood walks the same ground from the room inward. That gap between what a carver owns and what a carver uses is the whole argument of this page.

An advanced panel of mine, half finished. Notice the bottom, still nothing but pencil on bare wood.
When do I need my first gouge?
Buy a gouge second, once your blade will not fly through the work you want to make. Complicated projects leave you very limited when a blade is all you own.
My master used exactly that approach on me. All he gave me was a knife, and he taught me to use it in every carving for a long stretch. Then came the gouge. His words about it were plain.
You have to master knife before you're going to get to the gouge. If you can't master knife, I'm not going to give you gouge.
Get yourself a number 8 at about 10 millimeters, roughly three eighths of an inch. Land approximately in those numbers and all is well. The one I teach with was made by Ashley Iles.

A fishtail shape, close and clear. Most of my own tools are fishtails, because they reach corners.
Those numbers are a curve scale. Number 1 is a chisel, and it runs absolutely straight. Three is almost flat and still sweeps a little. The scale climbs through 4, 5, 6, 7 and 8, then ends at 9, a true half round. Go past that, to 10 or 11, and the shape becomes more like the letter U. My own first gouge, handed to me by my master, is a number 7, and it remains a favorite.
Number 9 is what I reach for to get shapes moving. Big gouges are even better, since a large tool can always act as a small one. The biggest mistake I see is somebody taking a tiny tool and zigging and zigging until they are worn out and cross.

What sharp looks like. One clean shaving lifting off the blank.
After that gouge I would add a small number 11 around one millimeter, for getting underneath and undercutting. Then a V-tool. That set's V-tool is 60 degrees and I would rather it were 45, or even 35, because I use a 35 degree V-tool a lot.
About that V-tool, let me correct myself. I called it one of the most used tools in any carving. Well, I should not say that. In relief carving, yes, it matters enormously, and so does the gouge. On a big sculpture you reach for gouges far more often, so that is the accurate way to put it.

The V-tool set against a drawn line, leaf pattern glued straight onto the blank.

Knife, chisel and gouge on one panel. The knife comes first, and the gouge follows it.
Small tools belong at the end of the work, never at the front of your shopping. Weighing a boxed set right now? Read what to look for in a wood carving tool set before the money leaves your hand, and my note on which tools a beginner actually uses covers the same ground.
Which wood should a beginner buy, and where do you find it?
Basswood is the board I put under every new carver, and that same tree answers to several names. European culture calls it lime wood, or linden.
Beautiful stuff. There is no grain in it. Of course grain exists, but no visible grain, which is a different thing entirely. Soft enough to learn on, and it holds the detail. Ask for lime timber in England. I am from Russia, and we call that wood lipa. Botanists file the whole family under Tilia, and the American board most of you will buy comes off Tilia americana.

The wood in my hands with its three names printed across the frame during the lesson.
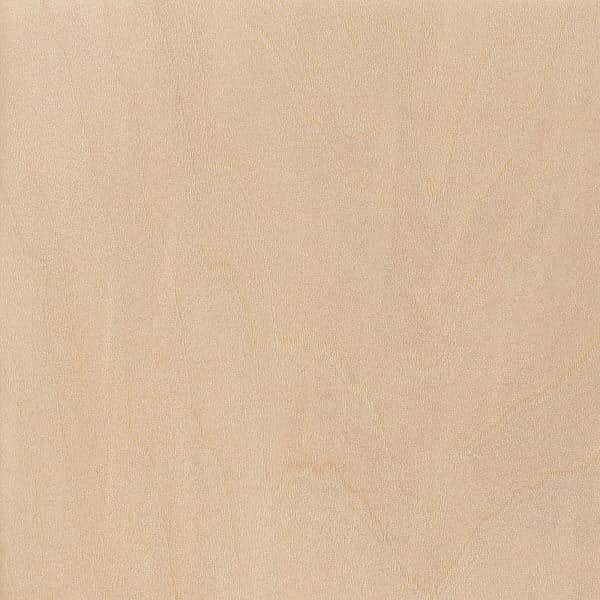
A macro of a basswood face. Those grain lines are there and they almost vanish.
Where do you buy it? Try a craft store in your own town first. In the United States a chain called Michaels carries basswood planks, and Woodcraft has them in the shop or at woodcraft.com. Amazon sells planks too.
The better road is a local hardwood lumberyard. Not Home Depot, not Lowe's, not Menards. Walk to the pro desk and ask whether they can get basswood, and usually they can. Google the words hardwood lumberyard and up come the yards that supply furniture makers. One warning, though. Many will not sell a single board, because they require a minimum, and that minimum used to be $300 and now runs to $500.

A bare plank on the bench, before a single line goes onto it.
Students of mine in Australia and New Zealand cannot get basswood at all. They ship it in from European stores, or they carve jelutong, another good wood, if I am pronouncing that correctly. My page about carving wood in Australia goes further, and the British list opens with lime.
Now the part the internet keeps getting backwards. Poplar I would not recommend. I highly suggest not to use poplar. Carvable, yes, and fine under paint, but harder work and it feels wrong under the tool. Maybe that is only my opinion. Even oak beats poplar to my mind, and maple is no place to send a beginner either. The yellow poplar entry at the Wood Database will give you numbers. My hands tell me something different.
Butternut I love. Good wood, honestly really excellent, though it does carry a pronounced grain, so a finished piece will not always look how you hoped. Hard to find in America now. Pennsylvania, Ohio, Indiana, yes. Down in the southern states, almost impossible. A page for butternut sits over there too, beside one for eastern white pine.

Small square practice blanks, and the rosette they turn into behind them.
Walnut is good. Oak depends on the oak, and white oak I do not like, while English brown oak carves beautifully. Nothing there is where I would start you, and I have never settled oak either way. Keep it in your pocket and read what kind of wood you should use for carving when the species question truly arrives, or the basswood page in my wood guide. A basswood entry sits at the Wood Database as well, beside a shelf of wood articles.
How big should a board be? Two inches of thickness is unnecessary. Twenty millimeters does fine for practice, although thicker stock stays more stable and will not warp as much on you. Buying, I check the edge for a quarter sawn or rift cut, never near the heart, closer to the bark side. Flat straight slices cup on you. I am no log cutter, yet those rings get read before I pay.

A steel rule across a block, so you can see how big a first piece really is.
For practice, use whatever is left over from another project. Two by four offcuts are the cheapest blocks I can find, and my list of softwoods worth practicing on covers the rest. That teaches you about wood grain for nothing at all. My article asking whether thicker wood carves better takes the thickness question apart properly.

The cheapest offcut I own, held over the paper that joins it to the work.
Are cheap carving tools worth buying?
Some inexpensive tools are honestly excellent, and I will name the ones I trust. Others are cheap in the way that costs money later.
Start with Schaaf. Chinese made, and a whole set of 12 runs $95. Those same 12 in Swiss made will cost around $500, so for the price of one and a half good gouges you get the entire set. My opinion, said out loud in that lesson, was that a hobbyist or even a professional furniture maker should definitely buy them.
The same lesson carries the limit. For professional wood carving, definitely it is not enough. Both halves came out of my mouth on one afternoon, so take them together.
An April 2020 livestream where I answered tool questions for the better part of an hour.
Then there is BeaverCraft, made in Ukraine. Inexpensive, and genuinely excellent tools. Their range is small and they look a little different, but anyone saving money can buy those and still carve some very good projects.

A budget starter roll opened flat, with compound beside the tools.
One caution before you go hunting. Cheaper tools than the ones I named are always out there, and not all of them are good quality. A cheap set lives in my shop too. I paid $15 for 20 of them or something like that, and I never carve with them. You could, do not get me wrong. I keep them for scraping.
Flexcut sells worldwide, and it is known as a good brand. I never use them, though I still have them. For me they will not deliver a professional result, and the reason is those sharp ridges on the tool, which just get to it. I mean, they get to you. Nothing is wrong with the tools. Carving with them works fine, and the range sits at Flexcut.
Brand rankings are where I contradict myself, so you had better hear both versions of it. In one lesson I put Auriou first, Ashley Iles second, Pfeil third. In another I called Ashley Iles my favorite maker of all the English makers, with Henry Taylor and Robert Sorby beside them, because Sheffield steel is gorgeous. Take the names. Leave the ranking, since I have never settled it. Stubai and Two Cherries live at that level for me.
No money reaches me from Ashley Iles or from BeaverCraft, and I have said both out loud on camera. Arriving in America from Russia, I owned exactly one gouge, a gift from my teacher, plus a knife of my own making.
If you want reading beside the bench, Popular Woodworking and Fine Woodworking both cover the shop, and general woodworking is a wider craft than wood carving. Veritas, the vise brand on my bench, is Lee Valley's own line.
What do I need for sharpening on the first day?
A strop and a bar of paste, and both can be made out of scrap when money is tight. Every tool arrives needing work, whatever the box promises.
One brand's Amazon listing says that if you are not planning to sharpen these tools, do not buy these tools. True of any brand. Doesn't matter what you buy, sharpening it is still on you, even when it arrives from the box ready to go. How long does a factory edge last? One day. Two days. Maybe a bit longer than that.
Any brand I buy, high end or not, gets reshaped, resharpened, and then re-stropped or rebuffed. During one small carving each tool went back on the buff three or four times. Look at the bevel on a brand new gouge sometime. Not acceptable at all, because it is far too short and far too high.

The pair that follows a knife home: a piece of leather and a bar of green compound.
Expensive stroppers are unnecessary. Go to a leather shop, get a normal piece of leather, and strop it with the paste. My grandfather did that with a straight razor and a hide, and that is where I first saw it done.

Charging the rough side of the leather with the bar. Those grey streaks are the whole trick.
Leather has a shiny side and a rough side. Rough holds the paste better. It charges better, and it rounds your edge more, being the softer side.
No leather where you live, or no money for leather? Take a block of basswood, whatever you carve with, charge it with any of the pastes, and the trick still works. A piece of wood is your friend. MDF behaves the same way, and a 10 millimeter board will not round the bevel, since it has none of that give.

A plain board charged with paste, standing in for leather. This one costs nothing.
Green paste is the aggressive one and blue is very fine. Honestly the choice matters little. My favorites are the Koch pastes, not cheap, though they last forever. BeaverCraft sell leather with a compound, and I believe that was around $10, or something like this.

Three strops on a mat, each one charged with a different compound.
With no stone at all and no way to afford one, use sandpaper. Some of you live in a different country, India let's say, where these prices are simply out of reach, because people do not make too much money around the world. Sandpaper is cheap in almost every country and the idea is identical. Diamond is not required.

Sandpaper flattened over a plate, doing the whole sharpening job.
When plates come within reach, cheap diamond ones run about $12 each on Amazon. Chinese, and no problem here at all, because the price is honest. A Work Sharp wheel at $12.99 is a bargain even without the machine, since it will lie on any flat surface and work by hand. A CBN wheel is $300. I own them. Not worth the money, and diamond does the job.

A diamond plate held down by two knurled screws, 1000 grit stamped on its face.
My stone is 1000 grit on one side and 400 on the other, worked on the pull, about ten strokes once the bevel is found. The angle comes to somewhere between 18 and 22 degrees if you want to be really technical, but I am not measuring. Sharpening and honing have whole encyclopedias behind them. My sharpening hub and the Carving Tool Sharpening course are where the work gets shown slowly.

A blade drawn along the plate, which is clamped down so that it cannot travel.
How do I set up my first bench and my first board?
You need some type of table, and a kitchen table honestly counts. Five short steps put you in business.
Step 1, clear a table and give yourself one flat surface
Expensive benches are unnecessary, and almost any surface will do. With a knife especially, no mallet and no heavy movement is involved, so almost any tabletop holds up. Where a house has no dedicated space and no workshop, use the kitchen table. Lots of my projects were made there. Plenty of people are afraid to start carving as a hobby because they think they have no room, and my article about carving without much space settles that worry.
Put one lamp beside the work while you are at it. Light coming straight down from above is the worst light there is, because it hides the cuts and the facets you just made. Magnifier lamps do the job for me, two of them, at about $90 each. One light is the minimum. Two if you can afford it.
Step 2, hold the board down before you carve
Some kind of clamp has to hold that piece. I use a simple clamping system. Where a bench has holes, two steel dogs will pin a plank without a screw anywhere near it.

Two steel pins holding a plank, with no clamp screw involved.
The other way is a paper sandwich. Take a scrap block, glue a sheet of paper between it and your work, spray both surfaces, and wait until a finger comes away without sticking before pressing them together. Carving those lions, about 48 inches each, 47 and 3/16 to be exact, I held all that weight by paper alone.

The drawing glued down, blank sitting in a clamp while its outline gets cleared.
Blue tape and super glue do that same job for pennies. Walk into a dollar store in the USA and a handful of tubes costs a dollar. Where blue tape is not sold in your country, any painter's masking tape stands in. My favorite spray now is Scotch Photo Mount, because it leaves no residue on the tools the way some glues do. About $9 for a can, I believe.
A vise is nice, though hardly urgent. Mine is a Bessey from Home Depot, roughly $20, with one small modification, and it works just fine. Non-slip pads help too, the kitchen liner kind, or a router pad.

A cheap cast iron vise holding a small blank.
Step 3, put two or three tools on the bench and no more
Two, three, five at the most stay within my reach, then each one goes back. Walk to the storage, take the tool, carve, walk it back. Three tools out is absolutely no problem, and a clear bench is a safe bench.

A bright bench with three tools spaced along its edge. A beginner can copy this exactly.
Lay them with the blades turned outward. People find that frightening at first, yet the sweep cannot be seen otherwise, and it is actually safer, because picking the tool up puts the edge away from your body.
Never place a hand in front of your knife. You can slip and cut yourself really, really badly. Keep Band-Aids in the shop. I have cut myself over a hundred times, and carelessness was not the cause, it is the nature of the work. Sometimes white painter's gloves go on, though a handle cannot be gripped properly through them. OSHA's woodworking pages take the machine side seriously, and my article about the real dangers for beginners covers the hand side.
Step 4, sharpen and strop the new tool before the first cut
Everything in the section above happens now, before any wood moves. On the pull, until the bevel comes up. Then the leather. Steel that arrived this morning still needs your hands on it this afternoon, and skipping that is how people end up blaming the board.
Step 5, draw the lines on the board with a soft pencil
My teacher handed me paper before he handed me steel, and the order was no accident. An 8B pencil is what I use, really soft, and drawing comes before carving. Rulers are not compulsory either. Living 2,000 years ago, I doubt you would own a ruler like ours.

A pencil actually drawing, straightedge held down by the other hand.
A marking gauge is one purchase I do recommend, and an expensive one is unnecessary. Any gauge from Amazon with a sharp knife as its cutting part will work. Where drawing frightens you, I wrote you do not need drawing skills to start for exactly that fear, and the first step in wood carving follows on from it.

The board once its border is ruled, before any wood has been carved away.
What can I leave in the shop for later?
The mallet can wait, and so can the bench, the big tools and the expensive stone. None of them stands between you and a first carving.
Do you even need to use a mallet? With a knife, never. Mallets went unused by me for years, since pushing seemed sufficient, and then I found how much more control one gives. Mostly a simple rubber head does my work, and rubber is easier on the hands because it absorbs the stroke for you. They come at 12, 16, 20 and 32 ounces. A whole article asks whether you need a mallet, and another explains what a carving mallet is.
Sandpaper for finishing gets two answers from me, so here are both. One of my finished pieces was done with just a blade and no sandpaper at all. In another lesson I said yes, sanding a thing is absolutely okay, because it all depends on the finish and on the application. Sometimes the whole surface gets scraped with a carving knife instead, the way carvers across Europe used to work.
How many tools does a carver actually need? I read a forum once where people said real carvers never use more than 20. I guess that makes me no real carver, because somewhere between half a thousand and a thousand of them live here, and the pile keeps growing. Plenty never get touched. A genuinely complicated project does want a little more than 20.

My shelves, close enough to count. Decades built that, and none of it was a first purchase.
None of that is a shopping list. It is a warning about the shape of the road, and the errors that grow along it are collected in common mistakes to avoid in wood carving and in the beginner mistake list. Worried about money? How expensive carving is as a hobby puts real figures on a first year, and the gravity of wood explains why one board feels heavier under the tool than another. Still deciding whether to pick up a blade at all? My case for the craft sits in why carving is one of the best ideas that could cross your mind.
One last thing about the word cheap. A knife for chip carving is not a cheap knife, whatever that name suggests to your ear. People hear the word and reach straight for the bargain bin. Nothing on this page costs more than that one misunderstanding.
Rather watch this happen than read it? The first workshop of Wood Carving: First Cuts for Beginners puts one knife in your hand and carves a molding with it before any gouge appears, and All about tools for Wood Carving is where every drawer gets opened and priced.
Frequently asked questions
How much should I spend on my first carving knife?
A number never gets attached to the one in my hand, and inventing one would help nobody. What I have said out loud is that knives are expensive, that a single knife can cost $40, and that $40 is real money. Buy quality once instead of replacing soft steel twice.
Can I start with a cheap boxed set instead?
Schaaf sells 12 for $95, and in the very lesson where I recommended them I also said that for professional wood carving it is definitely not enough. BeaverCraft out of Ukraine is different money again, and you can still carve some really good projects with those. Start there when a budget is tight.
Should I own a workbench or a vise before I begin?
Not at all. Some surface is the whole requirement, and my own kitchen table has produced lots of finished projects. Wanting a vise later is fine. Mine came from Home Depot for about $20 and needed one small modification. Paper and glue hold work far better than most people ever expect.
Is poplar acceptable if I cannot find basswood?
Poplar is my least favorite suggestion of all. It carves, and it is fine under paint, yet it feels wrong under the edge and it fights you. Cherry beats it. Even oak beats it. Around Australia and New Zealand, where basswood is unavailable, look for jelutong instead.
Does a brand new gouge really need sharpening?
Every single one, from every maker, including those arriving shaving sharp. Factory bevels come short and steep, and a pre-sharpened edge gives you a day or two of carving, maybe a little longer. Reshaping, resharpening and re-stropping happen to everything I unbox, without exception.
What size should my first practice board be?
Twenty millimeters of thickness is plenty and two inches is unnecessary. Thicker stock stays more stable and warps less, so use what your yard has on the rack. My rosette practice blanks get prepared at two and a half inches square by three eighths thick, ten at a time.
Filed under
- advantages of Basswood in carving
- aspen carving benefits for beginners
- Basswood for wood carving beginners
- beginner friendly wood carving materials
- best beginner wood carving projects
- best wood for beginners in wood carving
- Butternut wood carving tips
- carving techniques for various woods
- carving with pine for beginners
- cedar wood carving advice
- comparing wood types for carving
- easiest woods for new carvers
- exploring different wood types for carving
- fruitwoods for beginner carvers
- how to choose wood for carving
- is Balsa wood good for carving
- Oak wood carving beginner tips
- soft woods for easy carving
- tips for selecting wood for beginners
- top beginner woods for carving
- Understanding Wood for Carving